How to Sift Flour Without a Sifter?
When you buy through our links, The Breslin may earn an affiliate commission. Learn more
Basic cooking includes flour as the main ingredient for making daily meals. But there may be a possibility that your kitchen does not have a sifter to sift your flour. In such cases how to sift flour without a sifter?
The most common way to sift the flour in the absence of a sifter is wire whisk and strainer due to their easy availability. If you do not have either of them, then use a fork to sift the flour.This method aerates the flour and ensures uniform mixing of the ingredients.
Often a time crunch tempts you to skip this step. In some cases, this may be fine, but few recipes demand sifted flour for a delicate texture. For example, it is one of the important steps while baking.
There may be a possibility that you do not have the proper equipment or just do not feel like making an extra effort.
Does that mean you skip the sifting step? Firstly you need to know the reasons for giving importance to sifting.
How To Sift Flour Without A Sifter?
Here is a guide to some quick facts on how to shift flour without a sifter.
- Use a Fine Mesh Strainer: Stir the flour with a fork and pour the dry ingredient into the strainer, then hold its handle with one hand and taps it against the other hand to allow the ingredient to pass through.
- Sifting With A Wire Whisk Or A Fork: Pour the flour in a bowl and stir the flour in a quick, circular motion using a fork or wire whisk.
- Shake the bowl of the flour: Put your flour in a bowl and shake it gently. While shaking the bowl, you can lift flour up between two spoons and allow it to drop into the bowl.
- Use a colander: Pour the flour into the colander and tap on the side to sift the flour
- Use a Food Processor: Transfer your flour into your processor. Run the machine gently, a few times to make the flour free from lumps.
Why Is Sifting Flour Important?
Sifting flour is an important step to carry out various recipes smoothly with the desired final product. Sifting makes the flour lighter and lump-free, which further helps in the uniform mixing of dry and wet ingredients. Below are few reasons which encourage and justify the sifting process.
Avoid Lumps
Flour, when stored in a bag or container for a long time, starts to compact and cling together. Putting your flour through a sifter helps to break up any lumps in the flour.
This step enhances consistency in recipe results by removing larger particles in the form of a lump. It could result in densely textured baked goods or the one that would sink in the middle.
Aeration Of The Flour
Sifting initiates the aeration into the flour, making it easier to mix with wet ingredients while baking. With the additional air, your flour helps to make lighter, fluffier pastries and cakes. Aeration is done before measuring. Further, this makes the slurry fluffier. Aerated flour weighs less than non-aerated flour.
Accurate Measurement
Sifting the flour makes it fine and lighter, as it breaks up any lumps in the flour. Thereby, it gives more accurate measurements for recipes. It has been observed that a cup of sifted flour generally weighs 20-25 % less than a cup of non-sifted flour.
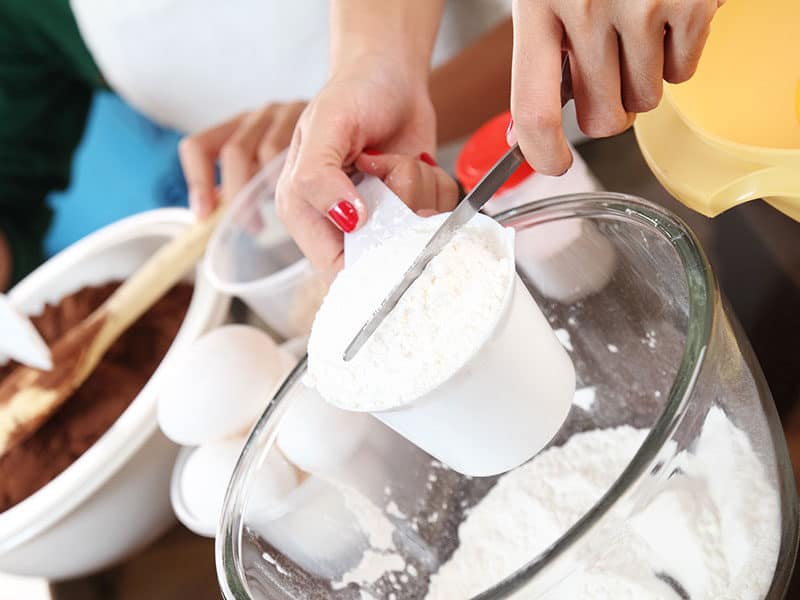
After sifting, the proper way to measure flour accurately for the recipe is listed below.
- Use a spoon to fluff up the flour within the container. As flour settles and becomes tightly packed inside the container, the spoon helps loosen the flour.
- Use a spoon to scoop the flour into the measuring cup.
- Use a knife or other straight edges utensils to level the flour across the measuring cup.
- Repeat until you have a smooth flour texture.
Watch this video to know more:
Uniform Mixing
Sifting makes it easier to mix the flour with other dry ingredients. Sifted flour is slightly more smooth and uniform than unsifted flour. The texture of such sifted flour is enormously fine and fluffy. Usually, this helps to combine them uniformly before mixing them with other wet ingredients.
Watch this video to know more:
Get Rid Of Bugs And Other Impurities
In the past, it has been noted that stored flour could have bugs or bits of debris in it. To avoid these unwanted impurities in your recipe, it is always better to sift the flour.
Sifting flour through a fine-mesh sifter helps to separate the insects like bugs and other impurities. This sifting process can be repeated few times until you get rid of them.
Sifting Is Used For Which Items?
Different types of flour, sugar, cocoa powder are few items that usually need sifting.
Skipping the step of sifting the flour is not an option. In this article, I will be discussing the various methods to learn how to sift without a sifter. But before that, let us get some idea about the types of flour available for sifting.
There are varying types of flour available to be used depending on the requirement of the recipe. All these flours are obtained from different sources by following different steps. Some common types of flour available and used by us are listed below.
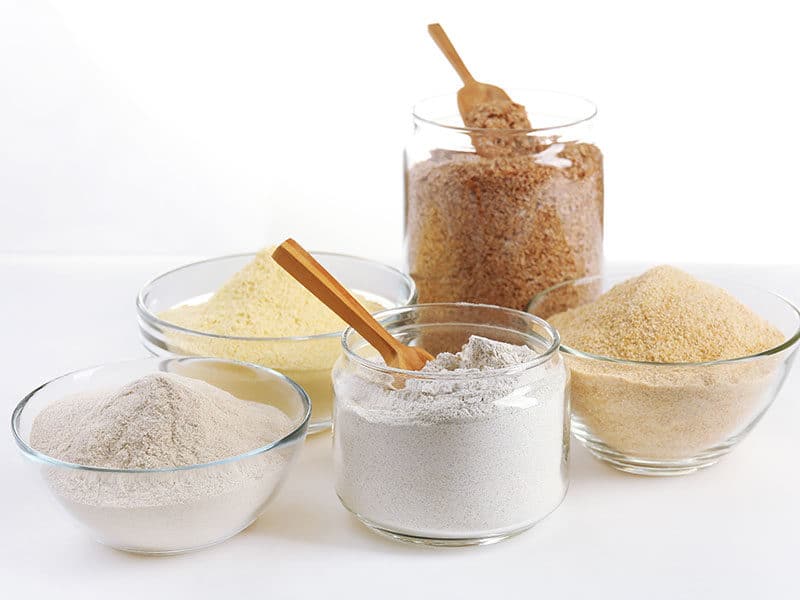
Whole Wheat Flour
Whole wheat flour contains nutritious components like bran, endosperm, and germ.When used for baking, it gives heavier bread. It is often mixed with all-purpose flour for a lighter texture and better rising. It has a small shelf-life than all-purpose flour.
All-Purpose Flour
It is prepared from a blend of high-quality gluten (hard flour) and low-quality gluten (soft flour). The flour is commonly used to bake. It is usually sifted before packing and selling. This flour is preferred for baking cookies, muffins, bread, pie crusts, pancakes, biscuits, pizza dough, and pasta.
Corn Flour
Corn flour is obtained by milling corn kernels. It is a white, fine powder.
Chickpea Flour
Chickpea flour is obtained from dried chickpeas. It has got an earthy smell, and it is very rich in protein. It is used to make fritters.
Self-Rising Flour
Self-Rising flour is similar to all-purpose flour. The only difference is the addition of salt and baking soda to make it a self-rising flour.
Cake Flour/Pastry Flour
Lightweight composed refined flour that ismade from low-quality gluten (soft flour). It is rich in starch. It is used for making delicate baking items likepastries, and cakes.
Semolina Flour
Polished, hard durum wheat flour was obtained by milling the flour grain coarsely. It is gluten-rich flour. Examples of semolina flour are its frequent use in makingpasta (grits), gnocchi, different variety of bread, and other baking items.
Oat Flour
A whole-grain substitute for self-rising flour that can be easily made at home by adding more leavening agents to ensure appropriate rise.
Almond Flour
Nut flours are made by grinding raw nuts. They require additional types of flour to give structure to baked goods.
How To Store The Flour?
The type of storage of flour is very important to maintain the same quality as when packed. Usually, the flour that we get from the market is packed in bags. Flour usually has a long shelf life but tends to go bad after 3-8 months.
Therefore, if the flour is left unused in its original bag for a long duration, the bag will absorb unpleasant odor and moisture from the surrounding. The presence of moisture leads to the growth of unwanted bugs inside the packed bags. To keep flour super-fresh, you should follow the following tips.
Store In An Airtight Container With Occasional Stirring
Always make sure to transfer the flour purchased from the shop into a glass container. By transferring the flour into an airtight container, you can stir the content with a spoon to add some air into your flour, thereby keeping it fresh and lighter.
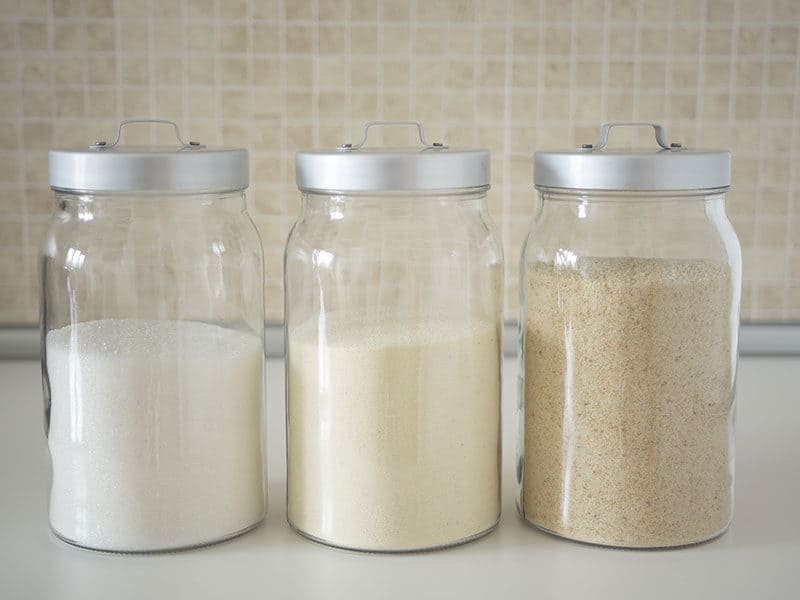
As you again need to use the flour for a recipe, give the flour another stir before using it.
Watch this video to know more:
Low-Fat Content Flour Has A Long Shelf Life
All-purpose flour should be stored in an airtight container in a cool and dry place. Normally, this helps you to increase its storage shelf life by 10 to 15 months. They usually have a long shelf life due to lower fat content.
Gluten-Free Flour Variety Should Be Refrigerated
Whole-wheat or gluten-free varieties can be stored for up to 5 months. For longer storage, use a moisture-proof container to refrigerate or freeze the flour.
Especially if your house is warm or you live in a humid climate. Always make sure to bring the refrigerated flour to room temperature while using it in yeast bread. Subsequently, this avoids the slow fermentation of the bread.
- Place the entire bag of flour into a large vacuum sealer bag. It will increase its lifespan by about 1-2 years.
- Appropriate storage of flour increases its shelf life, thereby making it easier to use and handle while including it in recipes. Further, this helps in sifting the powder smoothly irrespective of the presence of the sifter.
Watch this video to know more:
Tricks To Handle The Stored Flour
- If you have stored the flour in a plastic bag or an airtight container, give it a good shake before opening it. Generally, this helps the settled and compact flour to become lighter and easier to work with.
- The right type of storage of the flour is very vital. If stored in an airtight container, sifting takes less time when you are using it for baking.
How To Determine If The Stored Flour Is Non-Usable?
Usually, packaged flour comes with an expiry date which signifies its shelf life. But it has been observed that these labels are not trustworthy. The best method to determine if your flour is still safe to use is by its smell and color. Fresh flour is odorless. If the flour smells rancid or decolorized, it implies that the flour is stale, moldy, or sour.
Also if your flour has been exposed to any kind of moisture, large lumps may appear with a dampened smell. It should be immediately rejected.
Risks Involved If Used Perished Flour
If your flour has gone bad or its shelf life has expired, its molecular structure changes thereby converting it into harmful components. Using such material for cooking may be unhealthy and taste unpleasant.
But if your flour gets converted into a mold, it should be immediately discarded as they get converted into poisonous chemicals called mycotoxins. This chemical generates various symptoms like vomiting and diarrhea.
How To Sift Flour Without A Sifter? Detailed Guide + Tips And Tricks
Usually, when flour sits in the bag for a longer time, it slowly settles and becomes more compact. However, sifting breaks up the clumps and adds air to the flour, thereby making it lighter.
What to do if you do not have a sifter? In that case, follow few simple ways to carry out the sifting smoothly in its absence.
Use Of A Fine Mesh Strainer
A Strainer is a multipurpose item. It can be used to strain pasta, remove the bones from its stock, and drain excess water from washed vegetables, fruits, and chicken.
Similarly, it can also be used to sift flour and mix dry ingredients such as salt, baking powder, soda, sugar, and other powdered items. Follow the steps discussed below for sifting the flour using a strainer.
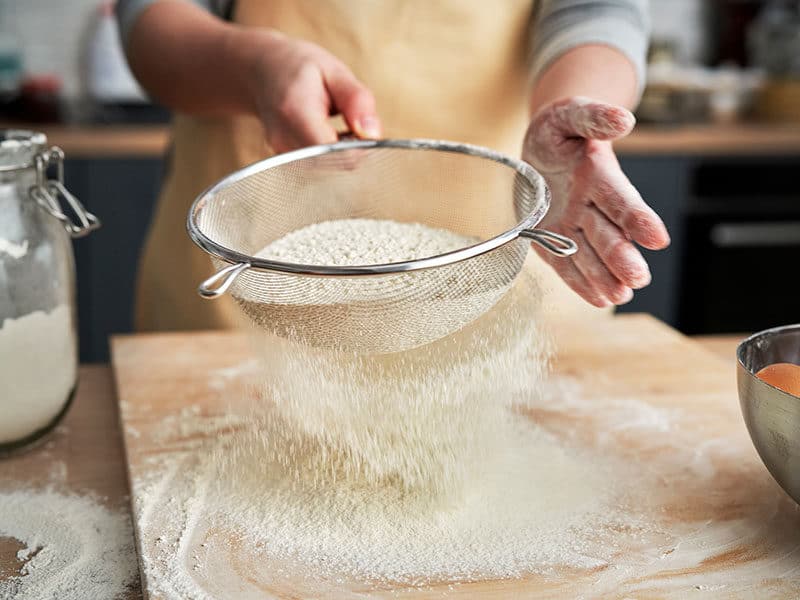
Stir the flour with a fork and pour the dry ingredient into the strainer, then hold its handle with one hand and taps it against the other hand to allow the ingredient to pass through.
While doing so, place a bowl slightly larger than the strainer so that the strained powder gets collected in the bowl. The collected powder should be thinner and free from the lump.
Watch this video to know more:
Precautionary Measure To Be Taken While Handling The Flour In A Strainer
However, while handling the powder and strainer together, it becomes vital to avoid any mess.
- Flour being a powdery item, should be poured slowly on the strainer. Too fast pouring may spill it on your shirt and work surface.
- If possible, change yourself to an older shirt or use an apron while sifting flour.
- What to do if the flour falling in the bowl while using the strainer has lumps in it?
- If the flour has lumps while falling in the bowl, you need to give a soft tap to avoid those lumps. Again place the flour in the strainer and repeat the process until you get a lump-free powder in the bowl.
- Allowing all the flour to pass through the strainer may take some time, so you need to keep patience while doing it. Do not try to fasten up the process by giving a hard tap, as doing so will not give you a thoroughly sifted powder.
Sifting With A Wire Whisk Or A Fork
It is an easier and faster method of sifting and is a popular method. The flour is added to a large bowl big enough to accommodate more flour and use a wire whisk.
In case of the absence of a wire whisk at home, you can make use of a big-sized fork as this will help inproviding you with better-sifted flour. The entire procedure gives you the same quality of flour as obtained when sifted using a sifter.
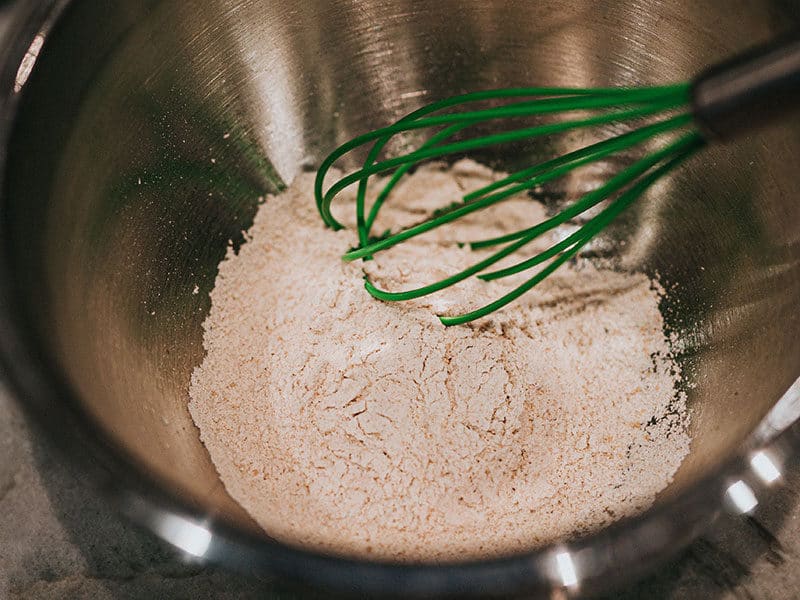
How To Use A Wire Whisk Or A Fork For Sifting The Flour?
- Take the right amount of flour in a bowl. Stir the flour in a quick, circular motion using a fork or wire whisk. So, this should give you the flour becoming uniform and lump-free gradually.
- In case the flour remains non-uniform than, you need to increase the stirring speed.
- For a large amount of flour, sifting may take more time, so maintain patience and keep working until the flour gets lighter and even out thoroughly.
- In case your wrist pains take a break in between while sifting.
Watch this video to know more:
Paying Attention To The Appropriate Sequence Of Sifting For A Recipe
While carrying out any recipe, wordings of a recipe need to be given importance.
- If the recipe states, “1 cup flour, sifted,” you need to measure 1 cup flour followed by transferring it to a bowl and sifting
- If the recipe states, 1 cup sifted flour”, you need to sift some extra amount of flour, measure the required amount and use it.
Whisking breaks the small clumps and adds air to the flour, thereby aerating the mixture. Being a dry ingredient, it does not stick to the bowl, so it does not require any washing. Whisker can be dusted off and put back in its place.
Using the above two mentioned methods, flour sifting can be done efficiently in the absence of a sifter.
Shake The Bowl Of The Flour
Another way to sift the flour in the absence of a sifter is to put your flour in and shake it gently. While shaking the bowl, you are adding air to the flour. You can lift flour up between two spoons and allow it to drop into the bowl. By following this technique, you can effectively get rid of big lumps.
Use Colander For Sifting
The colander is typically a larger bowl-shaped strainer, usually with bigger holes to strain off liquid from food after washing or cooking. However, it can also be used to sift your flour by mixing it with a fork. Pour the flour into the colander and tap on the side to sift the flour.
Food Processor Can Be Used For Sifting
In the absence of a flour sifter, an easily available item in the form of a food processor can be a good choice for sifting. A food processor has a similar function to that of a wire whisker. The only advantage of using a food processor is its faster speed and tendency to give less strain to arms.
Start the sifting process by taking a clean food processor. Take your flour and transfer it into your processor. Run the machine gently, a few times to make the flour free from lumps. Ensure that the lid is tightly fitted to avoid any spillage of the sifted flour all over your kitchen floor.
It has been observed that some flour bag that you purchase from the store is labeled as pre-sifted flour. Generally, this means that the flour has been sifted before undergoing the packaging step. But due to the long shipping of the flour, it gets compressed inside the bag and is no longer in sifted form as it reaches your kitchen.
So it becomes essential to sift the flour using the above few methods in the absence of a sifter. This step will always give you a more delightful taste.
Frequently Asked Questions
If you have questions regarding the sifting of flour, I will answer some of the commonly asked questions below.
Happy Baking With Your Sifted Flour
So far, after discussing at length on the sifting method and various alternatives to the sifter, you can decide which method would be best for sifting the flour for your baking.
I hope this article helped you with the information you were seeking. Please comment if you have any doubts and we will get back to you with the appropriate information. Do not forget to share this article!



Amanda Collins
Founder and Senior Culinary Editor
Expertise
Culinary Arts and Management, Food Journalism and Critique, Recipe Development and Testing, Global Culinary Traditions, Sustainable Food Practices
Education
Institute of Culinary Education (ICE), New York, NY
Program: Diploma in Culinary Arts
Focus: Intensive hands-on training in culinary techniques, recipe development, and kitchen management, preparing students for professional roles in the culinary industry.
Monroe College, New Rochelle, NY
Program: Associate in Applied Science in Culinary Arts
Focus: Practical culinary skills, including cooking techniques, menu planning, and kitchen operations, with an emphasis on hands-on experience and industry standards.
Amanda Collins is a seasoned chef and food editor with a deep love for global flavors. Trained at the Institute of Culinary Education and Monroe College, and with over 15 years in the culinary field, Amanda has refined her skills in kitchens worldwide. Her background in food studies gives her a unique ability to share both recipes and the cultural stories that shape them.
As senior culinary editor at thebreslin.com, Amanda’s work brings authentic dishes to life, inviting readers to explore new flavors and techniques from around the globe. Her approachable style makes it easy for anyone to bring a bit of the world’s cuisine into their kitchen.